Welcome to the fascinating world of epoxy casting resin! If you have ever marveled at those beautifully glossy and mesmerizing creations, then you’re in for a treat. Epoxy casting resin is a versatile material that allows you to unleash your creativity and bring your artistic visions to life.
Whether you are a seasoned artist or just starting out on your creative journey, this step-by-step tutorial will guide you through the process of mastering epoxy casting resin. From understanding its benefits to learning essential techniques, we’ve got everything covered.
Benefits of Using Epoxy Casting Resin
Epoxy casting resin is a versatile material that offers numerous benefits for both beginners and seasoned craftsmen. One of the major advantages of using epoxy casting resin is its exceptional clarity, which allows for the creation of stunning, glass-like pieces. Whether you’re making jewelry, decorative items, or even custom furniture, epoxy casting resin can give your creations a professional and polished look.
Another benefit of using epoxy casting resin is its durability. Once cured, it forms a strong and long-lasting bond that can withstand everyday wear and tear. This makes it an ideal choice for projects that require strength and resilience.
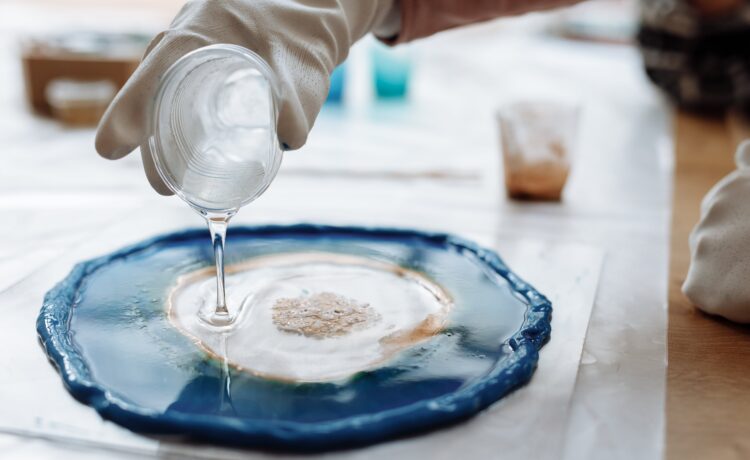
Furthermore, epoxy casting resin is easy to work with. It has a relatively low viscosity which means it flows smoothly and evenly into molds or around objects without forming bubbles or streaks. Additionally, it has a longer working time compared to other resins, allowing you ample time to perfect your project without feeling rushed.
Additionally, epoxy casting resin is highly customizable. You can incorporate various pigments, dyes or even add inclusions like glitter or small objects to create unique designs that reflect your personal style.
Lastly but not leastly , one of the most appealing benefits of using epoxy casting resin is its versatility in terms of applications. From creating intricate jewelry pieces to larger-scale art installations or even coating surfaces such as tabletops or countertops – the possibilities are endless!
Necessary Tools and Materials
To successfully master the art of epoxy casting resin, you’ll need a few key tools and materials. First and foremost, you’ll need epoxy resin itself. There are various types available, so make sure to choose one that suits your specific project.
Next, you’ll need a measuring cup or scale to accurately measure the resin and hardener ratios. Mixing epoxy requires precise measurements for optimal results.
A mixing container is essential for blending the resin and hardener together thoroughly. Choose a container with high sides to prevent any overflow during the mixing process.
You’ll also need stirring sticks or spatulas to mix the components properly. Wooden craft sticks or silicone spatulas work well for this purpose.
For safety purposes, it’s crucial to have protective gear such as gloves, goggles, and a respirator mask. Epoxy can be harmful if it comes into contact with your skin or eyes, so take precautions when working with it.
Additionally, having some mold release agent on hand is recommended. This will help prevent your epoxy project from sticking to the mold once cured.
Don’t forget about sandpaper! After your epoxy has fully cured, sanding can help smooth out any imperfections or uneven surfaces in your final piece.
Step-by-Step Guide for a Successful Epoxy Casting Project
1. Prepare your workspace: Start by selecting a well-ventilated area with minimal dust and debris. Cover your worktable with plastic or wax paper to protect it from any spills or drips.
2. Gather your materials: You will need epoxy casting resin, a mold of your choice, release agent (such as petroleum jelly), measuring cups, mixing sticks, and any additional items you want to embed in the resin.
3. Prepare the mold: Apply a thin layer of release agent to the inside of your mold to prevent the resin from sticking. Make sure to coat all surfaces thoroughly.
4. Measure and mix the resin: Follow the manufacturer’s instructions for mixing ratios and pour equal amounts of epoxy resin into separate measuring cups. Pour one part into another cup and stir gently until fully blended.
5. Pouring the resin: Slowly pour the mixed resin into your prepared mold, ensuring that it covers all desired areas evenly without overflowing.
6. Removing bubbles: To eliminate air bubbles that may have formed during pouring, gently run a heat gun over the surface or use a toothpick or skewer to pop them individually.
7. Curing process: Allow sufficient time for curing according to manufacturer recommendations before attempting to demold or manipulate your epoxy casting project further.
Remember, practice makes perfect when working with epoxy casting resins! Don’t be discouraged if you encounter challenges along the way – each project is an opportunity for growth and improvement in mastering this art form.
Common Mistakes to Avoid
When it comes to working with epoxy casting resin, there are a few common mistakes that beginners often make. By being aware of these pitfalls, you can save yourself time, money, and frustration.
One common mistake is not properly measuring the resin and hardener ratios. It’s crucial to follow the instructions provided by the manufacturer and accurately measure out the correct proportions of both components. Failing to do so can result in an incomplete cure or a sticky surface.
Another mistake is not thoroughly mixing the resin and hardener together. Make sure to mix them well until they are completely combined and no streaks or swirls remain. Inadequate mixing can lead to uneven curing or weak spots in your final piece.
Additionally, failing to remove air bubbles from your mixture before pouring it into molds is another common error. To avoid this issue, use a heat gun or torch to carefully pass over the surface of your poured resin, which will help release any trapped air bubbles.
Inspiration and Ideas for Epoxy Casting Projects
As you can see, epoxy casting resin offers endless possibilities for creative projects. Now that you have mastered the art of using this versatile material, let’s explore some inspiration and ideas to fuel your creativity.
1. Jewelry: Create unique and personalized jewelry pieces such as pendants, earrings, or rings by embedding small objects like flowers, gemstones, or even glitter into epoxy resin molds.
2. Coasters: Design stunning coasters by mixing different pigments or adding alcohol ink to create mesmerizing patterns. You can also incorporate various materials like dried leaves or shells for a natural touch.
3. Artwork: Use epoxy casting resin as a medium for creating beautiful artwork on canvas or wood panels. Experiment with colors, textures, and layers to achieve stunning abstract designs.
4. Home Decor: Bring a touch of elegance and uniqueness to your home decor by making custom tabletops, decorative bowls, vases filled with flowers encapsulated in resin, or even wall art pieces.
5. Paperweights: Preserve memories by creating personalized paperweights using photos or sentimental items embedded in clear resin blocks.
6. Keychains and Magnets: Make fun and functional accessories like keychains and magnets by pouring colored epoxy into silicone molds shaped like animals, fruits, letters—the possibilities are endless!
7. Furniture Upcycling: Give old furniture new life by incorporating epoxy resin into their design elements—fill cracks in wooden surfaces for a seamless finish or create eye-catching river tables with flowing colored resins between slabs of wood.
Remember to always experiment with different techniques and materials while working with epoxy casting resin—this is where true innovation lies! Let your imagination run wild as you push the boundaries of what is possible with this incredible medium.


